

celestron astromaster 114 manual
Lost your Celestron AstroMaster 114 manual? Find a free, downloadable PDF guide here! Get back to stargazing & unlock the secrets of the cosmos. **Celestron AstroMaster 114**.
Celestron AstroMaster 114EQ: A Comprehensive User Guide
Welcome! This detailed guide unlocks your telescope’s potential, offering setup instructions, observing tips, and troubleshooting for the Celestron AstroMaster 114EQ model.
The Celestron AstroMaster 114EQ is a popular Newtonian reflector telescope, ideal for beginner astronomers. It offers a generous 114mm aperture, gathering ample light for observing lunar details, planets, and brighter deep-sky objects like nebulae and star clusters. This model, part of the AstroMaster series (including 76EQ, 130EQ, and 130EQ-MD variations), is designed for ease of use and portability.
This guide provides a comprehensive walkthrough, from unboxing and assembly to aligning the optics and locating celestial targets. Whether you’re a first-time telescope owner or seeking a refresher, this manual will help you maximize your observing experience. Remember to consult Celestron’s technical support (310.803.5955 or www.celestron.com) for any setup questions.
Unboxing and Component Checklist

Carefully unpack your Celestron AstroMaster 114EQ. Ensure you have all listed components before proceeding. The box should contain: the telescope optical tube, equatorial mount, tripod, counterweight(s), finder scope, eyepieces (typically 10mm and 20mm), accessory tray, and this instruction manual.
Inspect each part for any shipping damage. Verify the tripod legs are present and undamaged. Confirm the equatorial mount’s components – including locking knobs and slow-motion control cables – are included. The accessory tray should also be present. If anything is missing or damaged, immediately contact Celestron Technical Support at 310.803.5955 or visit www.celestron.com for assistance.
Assembling the Tripod
Begin by removing the tripod from its packaging and extending the legs. Gently pull each leg outward until it locks into position. Adjust the leg height using the locking knobs on each section, ensuring a stable base. Once the legs are extended to your desired height, tighten the locking knobs securely.
Next, install the tripod accessory tray. Position the tray over the center of the tripod legs and align the holes; Secure the tray using the provided screws, tightening them firmly. The accessory tray adds stability to the tripod and provides a convenient location to store eyepieces during observation.
Extending and Securing Tripod Legs
To extend the tripod legs, locate the locking knobs on each leg section. Loosen the knobs, allowing you to pull the leg outward to the desired length. Extend the legs to a comfortable observing height, considering the terrain. Once extended, firmly tighten each locking knob to secure the leg in place.
Ensure all three legs are locked before proceeding. Regularly check the tightness of the knobs during use, as vibrations can sometimes loosen them. Proper leg extension and secure locking are crucial for a stable and wobble-free observing platform, maximizing your viewing experience with the AstroMaster 114EQ.
Installing the Tripod Accessory Tray

The tripod accessory tray adds stability and provides a convenient location to store eyepieces during observing sessions. To install, align the tray with the mounting points located near the base of each tripod leg. Gently press the tray down until it sits securely in place.
Typically, the tray will snap or click into position. Ensure it’s firmly attached before adding any weight. The tray significantly increases the tripod’s rigidity, reducing vibrations and improving image clarity. It’s a simple yet essential step in preparing your Celestron AstroMaster 114EQ for successful astronomical viewing.
Mounting the Telescope Optical Tube

Carefully remove the optical tube from its packaging. Locate the dovetail plate on the bottom of the tube. Align this plate with the mounting bracket on top of the equatorial mount. Gently slide the dovetail plate into the bracket, ensuring it’s securely seated.
Tighten the locking screws on the mounting bracket to firmly hold the optical tube in place. Do not overtighten, as this could damage the bracket or the tube. Double-check that the tube is stable and doesn’t wobble before proceeding. Proper mounting is crucial for safe and effective astronomical observations with your Celestron AstroMaster 114EQ.
Attaching the Equatorial Mount
Begin by identifying the equatorial mount components. This mount allows for tracking celestial objects as Earth rotates. Carefully position the mount onto the assembled tripod, aligning the base with the tripod head. Secure the mount to the tripod using the large central bolt and washer, tightening it firmly by hand.
Ensure the mount is stable and doesn’t wobble. The equatorial mount’s design facilitates precise adjustments for locating and following stars and planets. Familiarize yourself with the Right Ascension (RA) and Declination (DEC) control knobs, as these are essential for maneuvering the telescope.
Understanding the Equatorial Mount Components
The equatorial mount features several key parts. The Right Ascension (RA) axis points towards the North Celestial Pole, enabling tracking. The Declination (DEC) axis is perpendicular to the RA axis and controls vertical movement. Setting circles, marked with scales, aid in locating objects by celestial coordinates.
Counterweight shafts support the telescope’s balance. Slow-motion control cables connect to the RA and DEC axes for fine adjustments. The latitude adjustment screw sets the mount’s angle to match your location. Understanding these components is crucial for effective astronomical observation and precise telescope control.
Installing Counterweights
Begin by loosening the safety screw on the counterweight shaft. Carefully slide the counterweights onto the shaft, ensuring they are securely held by the shaft’s end cap. Tighten the locking screw on each counterweight to prevent slippage during operation.
Important: Always install counterweights before balancing the telescope. The number of counterweights needed depends on the weight of your optical tube and accessories. Regularly check the tightness of the counterweight screws to maintain balance and prevent accidental dislodging, ensuring safe and stable observing sessions.

Balancing the Telescope
Proper balancing is crucial for smooth tracking with your equatorial mount. First, loosen the RA and DEC clutches. Gently release the telescope; it should remain stationary in any position. If it drifts, adjust the counterweights until balance is achieved in Right Ascension (RA).
Next, balance in Declination (DEC) by sliding the optical tube within the mounting rings. Securely tighten all locking knobs once balanced. Regularly re-check balance, especially when changing eyepieces or adding accessories, to ensure effortless and accurate tracking of celestial objects throughout your observing session.
Balancing in Right Ascension (RA)
To balance in RA, begin by loosening the RA clutch knob on the equatorial mount. Gently release the telescope; it should not drift left or right. If it does, adjust the position of the counterweights along the counterweight shaft. Moving the weights further out increases the counterweight effect, while moving them closer reduces it.
Fine-tune the counterweight positions until the telescope remains perfectly still in any RA position. Once balanced, securely tighten the counterweight locking screws and the RA clutch knob. This ensures smooth, controlled movements when tracking celestial objects across the night sky.
Balancing in Declination (DEC)
Achieving balance in DEC is crucial for effortless tracking. Loosen the DEC clutch knob on the equatorial mount. Gently release the telescope; it should remain stationary in any DEC position. If the telescope drifts up or down, slide the optical tube within the mounting rings.
Adjust the tube’s position until perfect balance is achieved. Tighten the mounting ring screws to secure the tube, and then re-tighten the DEC clutch knob. Proper DEC balance minimizes strain on the mount and allows for precise, smooth adjustments when locating and following celestial targets.
Inserting the Finder Scope
The finder scope assists in locating objects. First, loosen the retaining screws on the finder scope bracket. Gently slide the finder scope into the bracket until it’s securely held. Do not overtighten the screws, as this could damage the scope. Ensure the crosshairs within the finder scope are visible and focused.

Alignment (covered later) is key. The finder scope provides a wider field of view, making initial target acquisition easier. Once aligned with the main telescope, centering an object in the finder scope will bring it into the telescope’s field of view.
Installing and Using Eyepieces
Eyepieces determine magnification. Loosen the thumbscrews on the focuser drawtube. Gently insert the desired eyepiece into the drawtube, then tighten the screws to secure it. Start with the lowest magnification eyepiece (highest focal length) for easier object location.
Focusing is achieved by turning the focus knobs, bringing the image into sharp clarity. Understanding magnification: it’s calculated by dividing the telescope’s focal length (850mm for the 114EQ) by the eyepiece’s focal length. Choose eyepieces based on observing conditions and desired detail.
Understanding Magnification
Magnification is a key concept in telescope use. It’s determined by dividing your telescope’s focal length (850mm for the AstroMaster 114EQ) by the focal length of the eyepiece you’re using. For example, a 20mm eyepiece yields 42.5x magnification (850mm / 20mm = 42.5x).
Higher magnification isn’t always better. Atmospheric conditions, light pollution, and telescope aperture limit useful magnification. Excessive magnification results in a dim, blurry image. Start with low power for finding objects, then increase magnification gradually for detail.
Choosing the Right Eyepiece
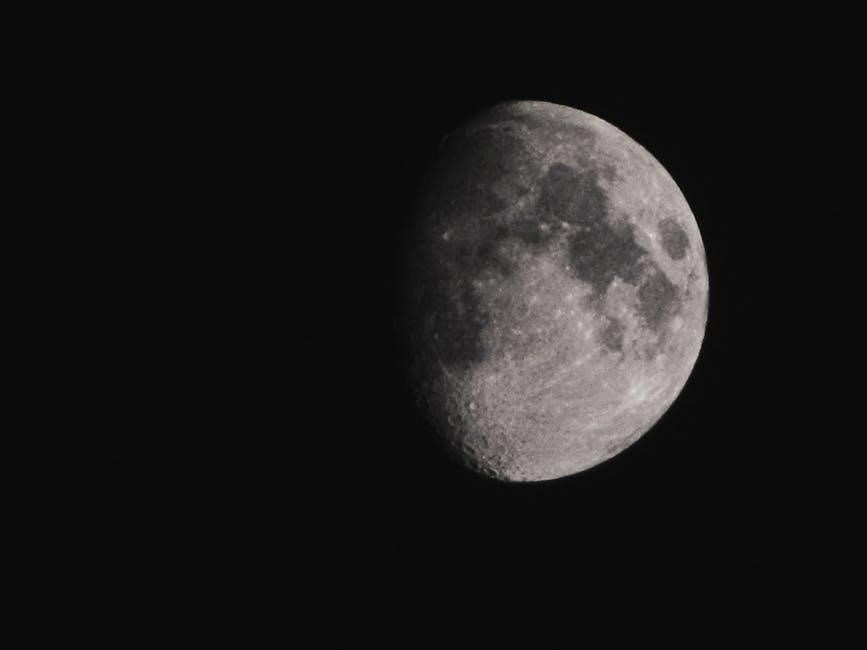
Selecting an eyepiece depends on your observing goals. Lower magnification eyepieces (25mm or larger) provide a wider field of view, ideal for locating objects and observing larger celestial wonders like the Moon or bright nebulae. Higher magnification eyepieces (10mm or smaller) reveal finer details on planets and double stars, but offer a narrower field of view.
The AstroMaster 114EQ typically includes several eyepieces. Experiment to find what works best for each target. Remember, atmospheric conditions impact usable magnification – on nights with poor seeing, lower power is preferable.
Aligning the Finder Scope
Precise alignment is crucial for easily locating objects. During daylight, point the telescope at a distant, easily identifiable target – a telephone pole or building works well. Center this object in the telescope’s main view using a low-power eyepiece.
Now, without moving the telescope, look through the finder scope. Use the adjustment screws on the finder scope bracket to adjust its aim until the same object is centered in the finder’s crosshairs. This process ensures the finder scope and telescope are accurately aligned, making celestial navigation much simpler.
Basic Astronomical Observing Techniques
Start with low power using a longer focal length eyepiece for a wider field of view, aiding initial object location. Once centered, increase magnification with shorter focal length eyepieces for detailed views. Remember, higher magnification reduces brightness and field of view.
Allow your eyes to adjust to the darkness – approximately 20-30 minutes. Avoid white light; use a red flashlight to preserve night vision. As Earth rotates, objects will drift; use the slow-motion control knobs to track them smoothly, keeping them centered in your eyepiece for prolonged observation.
Locating Celestial Objects
Utilize star charts and apps to identify constellations and target objects. Begin with bright, easily identifiable targets like the Moon, planets (Venus, Mars, Jupiter, Saturn), and bright stars. The finder scope assists in initial aiming; align it precisely with the main telescope (see alignment section).
Start with a low-power eyepiece to locate the object, then gradually increase magnification. Remember the field of view is narrower at higher magnifications. Practice “star hopping” – moving systematically from brighter stars to fainter objects using your star chart as a guide. Patience is key; dark adaptation improves visibility.
Tracking Objects as They Move
Earth’s rotation causes celestial objects to appear to drift across the sky. The equatorial mount, when properly aligned, compensates for this movement. Use the slow-motion control knobs on the Right Ascension (RA) and Declination (DEC) axes to make fine adjustments and keep the object centered in your eyepiece.
For longer observing sessions, understand that continuous adjustments are necessary. Tracking becomes easier with practice. The speed of drift depends on the magnification; higher magnification requires more frequent adjustments. Regularly re-center the object to maintain a clear view and enjoy prolonged observation.
Understanding and Using the Equatorial Mount
The equatorial mount aligns with Earth’s axis, enabling easier tracking of celestial objects. It features two primary axes: Right Ascension (RA) and Declination (DEC). RA controls movement east to west, mirroring the sky’s apparent rotation, while DEC controls north-south movement.
Proper polar alignment is crucial for accurate tracking. Loosen the latitude adjustment and set it to your location’s latitude. Then, align the mount’s polar axis with the North Celestial Pole. Utilize the slow-motion control knobs for precise adjustments during observation, compensating for Earth’s rotation and maintaining object visibility.
Celestron Sky Maps and Resources

Enhance your observing experience with Celestron’s readily available sky maps! These maps, like the Sky Maps (93722), serve as excellent teaching guides, illustrating constellations, planets, and deep-sky objects visible with your AstroMaster 114EQ. They simplify locating targets and understanding celestial coordinates.

Celestron’s website (www.celestron.com) provides a wealth of additional resources, including downloadable star charts, observing tips, and software recommendations. Explore online astronomy communities and forums for shared knowledge and assistance. Utilize astronomy apps on your smartphone for real-time sky views and object identification.
Troubleshooting Common Issues
Difficulty locating objects? Ensure proper finder scope alignment – a crucial first step. Fuzzy images often indicate poor focusing; adjust the focuser slowly until sharpness is achieved. If the image still appears unstable, verify the tripod is on a solid surface and fully extended and secured.
Experiencing mount stiffness? Check for any obstructions hindering smooth movement. Contact Celestron Technical Support at 310.803.5955 or visit www.celestron.com for further assistance. Remember to consult the full instruction manual for detailed diagrams and solutions to common problems.

Care and Maintenance
Protect your investment! Regularly dust the telescope’s optical tube and lenses with a soft, lint-free cloth. Avoid harsh cleaning solutions. Store the telescope in a dry, dust-free environment when not in use, ideally covered to prevent dust accumulation.
Periodic checks are vital. Inspect tripod legs and tightening screws for looseness. Lubricate moving parts of the equatorial mount sparingly, if needed. Handle eyepieces with care, avoiding fingerprints on the lens surfaces. Refer to the Celestron manual for detailed cleaning and storage guidelines to ensure longevity.
Safety Precautions
Never look directly at the sun through the telescope or finder scope – it can cause instant and permanent blindness! Always supervise children when using the telescope. Avoid observing near power lines or obstructions. Ensure the telescope is stable and securely positioned on the tripod before use.
Be mindful of your surroundings during nighttime observing. Use a red flashlight to preserve night vision and avoid disturbing others. Do not disassemble the optical components unless you are a qualified technician. Follow all instructions in the Celestron manual to operate the telescope safely and responsibly.